
Automated Reports sends chosen FoodEase reports to email addresses on a schedule — daily, weekly, or other frequencies — in PDF or other supported formats.
How to open
Option A — from the report hub
- Open View All Reports.
- Click the green Automated Report button.
Option B — direct navigation
- Log in to FoodEase Office.
- Go to Reports → Automated Reports (or
/dashboard/reports/automated-reports).
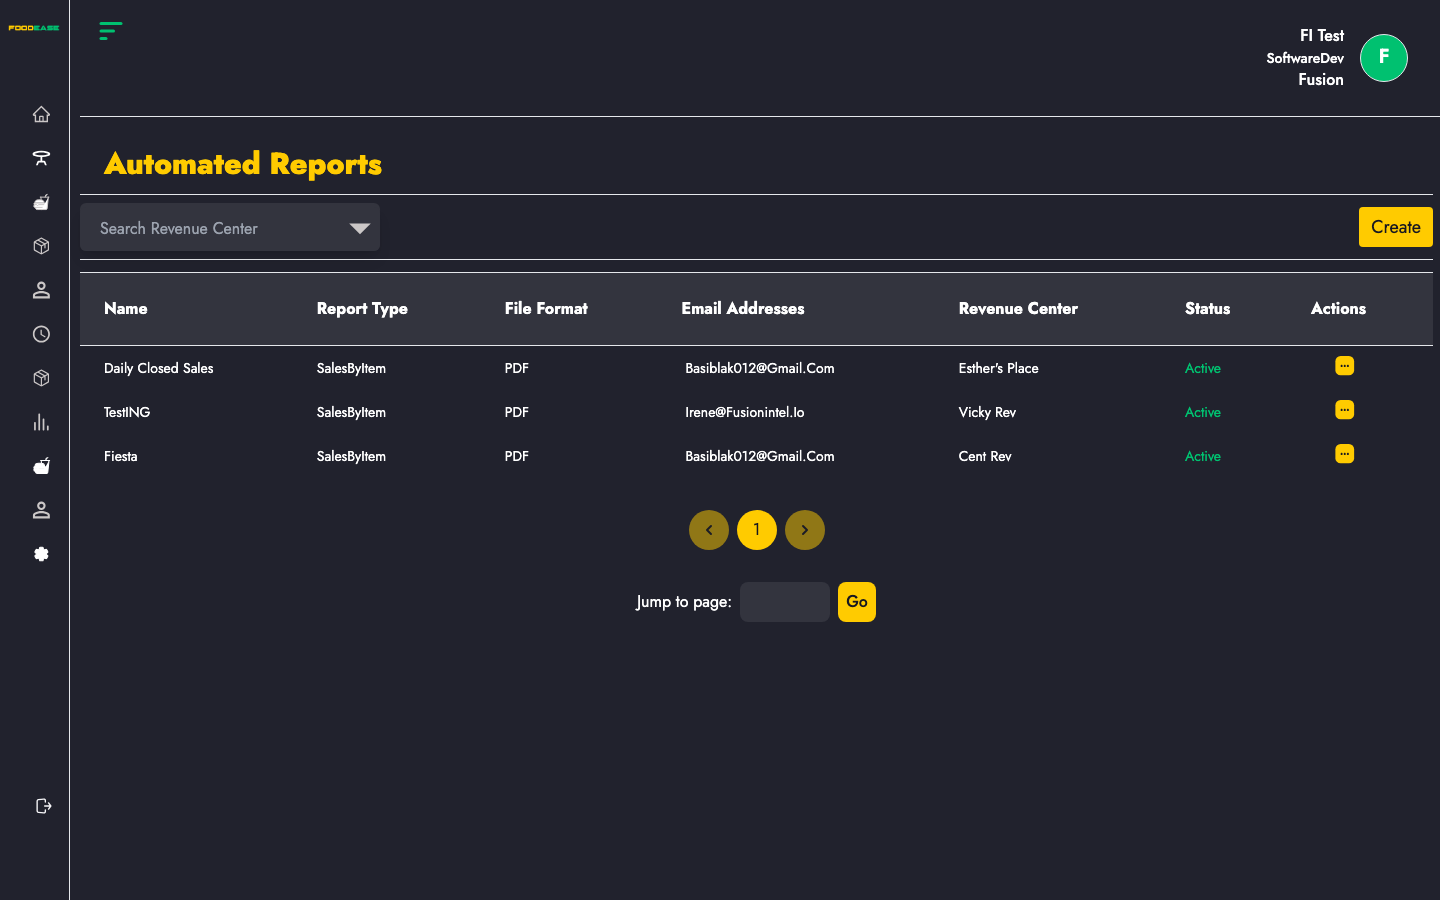
Automated reports list
The table shows every schedule configured for your restaurant:
| Column | Description |
|--------|-------------|
| Name | Label you gave the schedule |
| Report type | Which report is generated |
| File format | Output format (e.g. PDF) |
| Email Addresses | Recipients who receive the file |
| Revenue center | Scope of the report data |
| Actions | View details, edit, or manage the schedule |
Use pagination at the bottom if you have many schedules.
Create an automated report
- On the automated reports list, click Create (or open Create Automated Report).
- Complete the form:
| Field | Description |
|-------|-------------|
| Name | Friendly name for this schedule |
| Report type | Select from available report types |
| Report file format | Choose output format |
| Revenue center | Revenue centre included in the export |
| Frequency / Frequency type | How often the report runs (e.g. every N days/weeks) |
| Send time | Time of day to send |
| Send day | Day offset used by the scheduler |
| Days before / Days after | Optional window around the send date for report data |
| Send empty | Whether to email when the report has no rows |
| Email addresses | At least one valid email; add multiple rows for multiple recipients |
- Save the schedule.
FoodEase validates email addresses and required dropdowns before creating the job.
View or edit a schedule
- From the list, open Actions on a row.
- View — inspect configuration in a read-only modal.
- Edit — opens the same form pre-filled for updates.
Tips
- Send test schedules to yourself before adding finance or operations distribution lists.
- Match Revenue center to the outlet managers need — avoid sending all-centre reports to single-site recipients.
- Pair automated sales reports with manual review of Sessions during reconciliation periods.
Related guides
- View All Reports — manual report catalogue
- Sales Metrics Report — common choice for scheduled KPI emails