
This guide walks through the Create Item form in FoodEase Office. The form adapts based on the Item Group you choose — fields, pricing tables, and child-item sections change accordingly.
Before you start
Set up these first (links open in FoodEase Office):
- Item Class
- Unit of Measurement and UoM Relationship (for recipes and inventory)
- Sales Tax
- Revenue Centre and Preparation Area
- Vendors and Locations (for stock-tracked items)
Permission required: Create Item or Edit Item (CAN_CREATE_ITEM / CAN_EDIT_ITEM).
How to open the create form
- Log in to FoodEase Office.
- Sidebar → Items → Items.
- Click Create Item (top right).
You can also go directly to: /dashboard/items/create-items
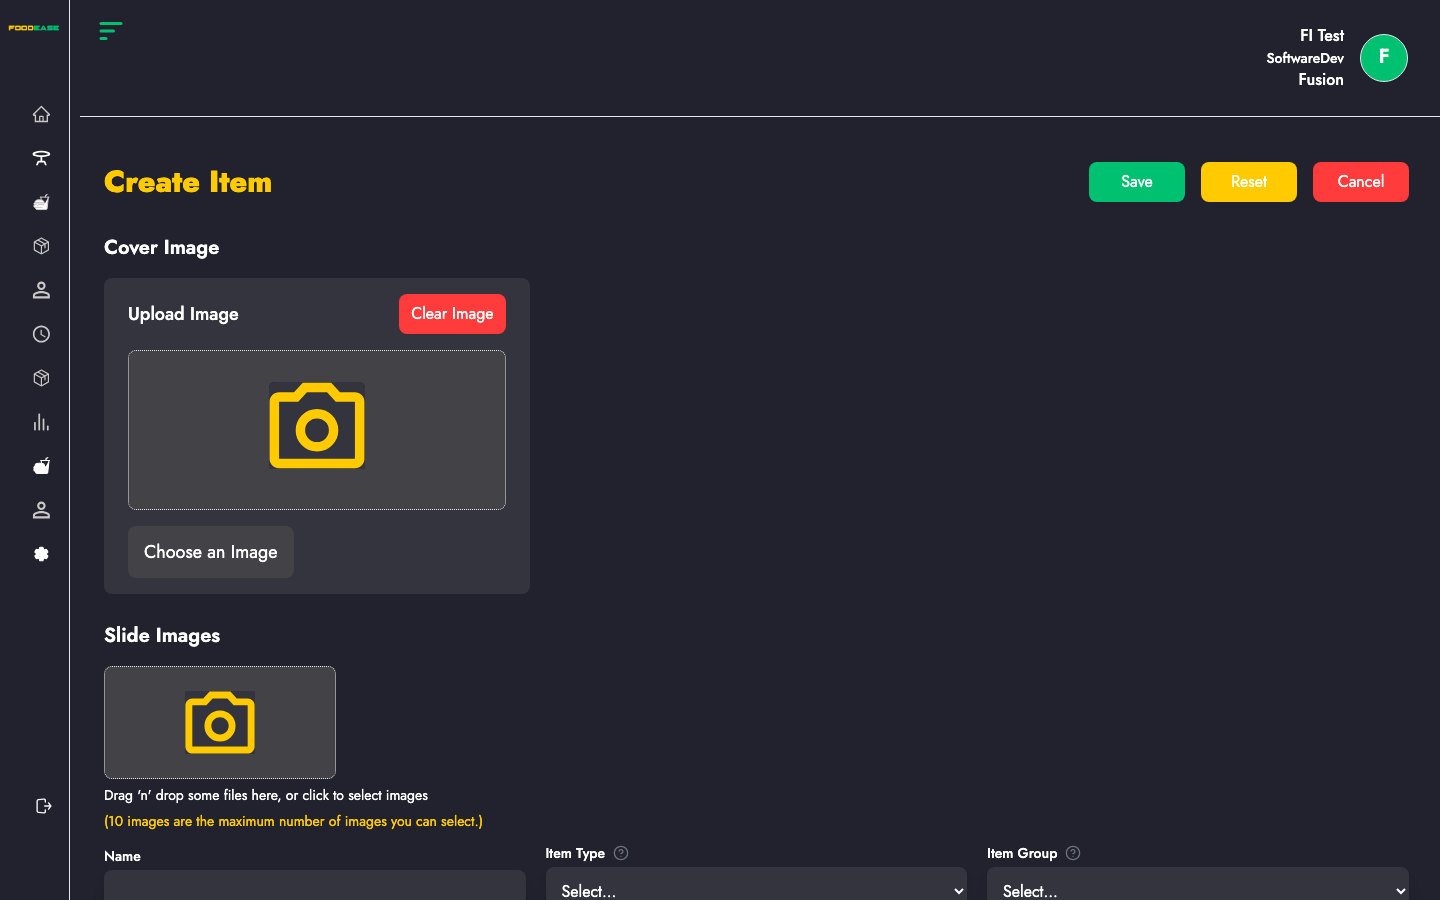
Form header actions
| Button | What it does |
|--------|----------------|
| Save | Validates and creates the item (green) |
| Reset | Clears the form back to defaults (create only) |
| Cancel | Returns to the Items list without saving |
Step 1 — Choose Item Group first
Item Group is the most important field. It cannot be changed after saving (locked on edit). Changing it while creating resets related sections (pricing, child items, prep areas).
| Group | Use for |
|-------|---------|
| Single | Standalone menu product sold as-is (e.g. a burger, a drink) |
| Recipe | Dish made from ingredients/components with quantities |
| Package | Bundle of items and/or recipes sold together |
| Parent | Base item with selectable child options (variants/combos) |
| Component | Ingredient used inside recipes (not usually sold alone) |
| Sundry | Miscellaneous sellable items (e.g. napkins, service items) |
Pick the group before filling other fields. Switching groups clears pricing tables and nested item lists.
Step 2 — Images
Cover Image
- Upload the main product image shown on POS, web, and channels.
- Required if you enable the WhatsApp sales source.
Slide Images
- Add additional gallery images (carousel) for the item.
- Supported for Single, Recipe, Package, and Parent groups.
Step 3 — Basic details
| Field | Required | Description |
|-------|----------|-------------|
| Name | Yes | Full product name (min. 3 characters) |
| Item Type | Yes | AtSale (made when ordered) or BeforeSale (pre-made) |
| Item Group | Yes | See table above — locked after create |
| Short name | No | Abbreviation for receipts/POS (max 10 characters) |
| Preparation Time (mins) | No | Kitchen prep time estimate |
| Description | No | Customer-facing or internal description |
Variable pricing (Single, Recipe, Component, Sundry)
- Allow variable pricing? — When enabled, POS can sell at a price different from the price set here.
Inner price (Parent only)
- Use inner price? — When enabled, the price of each child option is used instead of a single parent price.
Step 4 — Tax, units, and inventory
| Field | Required | Notes |
|-------|----------|-------|
| Sales Tax | Yes* | *Not required for Parent/Package. Use + to create tax inline. |
| Unit Of Measurement | Yes | How the item is sold (piece, plate, glass) |
| Inventory Unit Of Measurement | No | How stock is counted/purchased. Use + to add UoM or relationship. |
| Unit | Yes | Numeric unit size (auto for Parent/Package). Must be > 0 for most groups. |
| Is Transformable? | No | Recipe only (when no parent-in-recipe). Shows item in stock overview and enables stock conversions. |
Step 5 — Pricing
| Field | Description |
|-------|-------------|
| Cost Price | Your cost per unit (used in margins and reports) |
| Selling Price | Default selling price |
| Allow price overrides per revenue centre | When enabled, you can set different cost/selling prices per location in the table below |
| Vendors | Required for Single, Component, and Sundry — select at least one supplier |
Changing Selling Price can auto-update prices in the revenue centre table when overrides are enabled.
Step 6 — Classification and channels
| Field | Required | Description |
|-------|----------|-------------|
| Item Class | Yes | Menu category (e.g. Mains, Drinks). Use + to create inline. |
| Topping Class | No | Optional class for toppings/modifiers |
| Topping required? | No | Only shown when a Topping Class is selected |
| Select Sales Source | Yes | Toggle POS, Web, Mobile, WhatsApp, etc. (hidden for Component/Sundry) |
Step 7 — Revenue centres, prep areas, and store locations
This section appears once an Item Group is selected.
Auto Fill
If available, click Auto Fill to populate revenue centres, preparation areas, and store locations based on your defaults and the selling/cost price you entered.
Price table
For each revenue centre you include:
| Column | Description |
|--------|-------------|
| Revenue centre | Location where the item is sold |
| Selling price | Price at that centre (can differ per centre) |
| Cost price | Cost at that centre |
You must select at least one revenue centre.
Preparation areas (Single, Sundry, Component, Recipe)
- One prep area per selected revenue centre.
- Routes kitchen tickets to the correct station.
Store locations (Single, Sundry, Component)
- One store location per selected revenue centre.
- Number of locations must match number of revenue centres.
- Drives inventory tracking and stock deductions.
Step 8 — Group-specific child items
Package or Parent
Add line items via the package/parent table:
| Field per row | Description |
|---------------|-------------|
| Item | Child product, recipe, or parent item |
| Preparation area | Kitchen station for that line |
| Quantity | How many included |
| Selling price | Price contribution for that line |
You must add at least one child item, recipe, or parent entry.
Recipe
Two additional sections:
Recipe components table
| Field | Description |
|-------|-------------|
| Component item | Ingredient from your catalogue |
| UoM | Unit for the quantity |
| Quantity | Amount used in the recipe |
| Cost | Optional line cost |
Parent in recipe (optional)
| Field | Description |
|-------|-------------|
| Parent item | A parent item this recipe can belong to |
| Quantity | Units per parent |
| Selling price | Price when sold as part of parent |
| Max qty / Limit / Base unit | Controls portioning rules |
Recipes require at least one component, item, or related entry.
Step 9 — Save
- Review validation messages (shown in red under fields and at section footers).
- Click Save.
- On success, you are redirected and the item appears on the Items list.
Common validation errors
| Message | Fix |
|---------|-----|
| Select at least one rev center | Add a row in the price table |
| Number of preparation areas must match… | Assign one prep area per revenue centre |
| Number of stores must match… | Assign one store location per revenue centre |
| Choose at least one item | Add child items for Package/Parent/Recipe |
| Image is required when WhatsApp… | Upload cover image or disable WhatsApp source |
| Select tax / Select UoM | Complete required dropdowns for your item group |
Quick reference — required fields by group
| Field | Single | Recipe | Package | Parent | Component | Sundry |
|-------|--------|--------|---------|--------|-----------|--------|
| Sales tax | ✓ | ✓ | — | — | ✓ | ✓ |
| UoM | ✓ | ✓ | ✓ | ✓ | ✓ | ✓ |
| Unit | ✓ | ✓ | auto | auto | ✓ | ✓ |
| Vendors | ✓ | — | — | — | ✓ | ✓ |
| Sales sources | ✓ | ✓ | ✓ | ✓ | — | — |
| Prep areas | ✓ | ✓ | — | — | ✓ | ✓ |
| Store locations | ✓ | — | — | — | ✓ | ✓ |
| Child items table | — | ✓ | ✓ | ✓ | — | — |